

Getting started with one-to-one language tutoring follows a clear sequence: set your goals, create a learner profile, shortlist and message tutors, book a trial lesson, confirm payment and time zone, prepare your tech and materials, complete the first-lesson needs analysis, then follow up within 24 hours. Most learners arrive at their first private lesson with good intentions but no clear plan, and that gap is exactly what this guide closes.
Your onboarding steps at a glance:
- Clarify your language goals and current level
- Gather study materials and build a short daily routine
- Create your learner account and write a profile
- Search, filter and shortlist tutors
- Message tutors and book a trial lesson
- Confirm payment, fees and time zone
- Run a pre-lesson tech and content check
- Complete the first-lesson needs analysis
- Follow up, schedule next lessons and review progress
Key takeaways
A prepared learner with a written goal, a complete profile and a 15-minute tech check gets more from every lesson than one who relies on the tutor to fill the gaps.
| Point | Details |
|---|---|
| Set a specific goal first | Write one outcome with a date before you search for tutors or create a profile. |
| Complete intake forms early | Finishing pre-lesson forms at least 24 hours ahead lets tutors prepare targeted materials. |
| Trial two to three tutors | Book short trials before committing to a package; rank by who best understood your goal. |
| Screenshot your confirmation | Save the booking confirmation and check the final price including any platform fee. |
| Tutoroo simplifies each step | Tutoroo's profile prompts, tutor filters and messaging tools support the full onboarding process across 386,000+ tutors. |
Table of Contents
- What are your language goals before you search for tutors?
- How to gather study materials and build a daily practice routine
- How to create a learner profile that attracts the right tutors
- How do you search, filter and shortlist the right tutors?
- What should you say when you message a tutor and book a trial?
- Payment, fees, confirmations and scheduling best practices
- Pre-lesson checklist: what to do 30–60 minutes before your lesson
- What happens in the first lesson, and how should you use the needs analysis?
- After the lesson: how to follow up and keep momentum going
- Common onboarding mistakes and how to fix them quickly
- Your copyable onboarding checklist
- Why preparation, not luck, is the hidden lesson
- Tutoroo makes every onboarding step easier
- Sources
What are your language goals before you search for tutors?
The step-by-step booking workflow starts well before you open a search filter. Answer three questions first: which language, what your current level is, and what you need the language for (travel, a job interview, an exam, or personal connection). Vague answers produce vague tutor matches.
Three goal templates you can copy right now:
- 90-day goal: "I want to hold a 5-minute conversation about my work in Spanish without stopping to translate in my head."
- 6-month goal: "I want to pass the DELF B1 French exam with a score of at least 60%."
- Ongoing goal: "I want to read a Japanese novel in the original within 18 months, starting from beginner level."
Clear goals let tutors plan from session one rather than spending the first lesson figuring out where you are. They also help you recognise progress, which keeps motivation alive between lessons.
Pro Tip: Write your goal on a sticky note and put it on your monitor. Tutors who see a specific goal in your profile message you faster and with more relevant questions.
How to gather study materials and build a daily practice routine
You do not need an expensive textbook before your first lesson. The minimum kit is a dedicated notebook, a dictionary app (Google Translate or WordReference work well for most languages), one flashcard app such as Anki, and a calendar you actually check.
A sample 20-minute daily routine that supports tutoring:
- 5 minutes — review yesterday's flashcards in Anki
- 10 minutes — read or listen to one short piece of content in your target language (a news headline, a podcast clip, a song lyric)
- 5 minutes — write three sentences using new vocabulary from your last lesson
The payoff is compounding. Tutors cover new ground faster when you arrive having practised the previous session's material. That 20 minutes a day between lessons is where the real retention happens, not in the lesson itself.
Pro Tip: Block your daily practice in your calendar the same way you block a meeting. Learners who treat it as optional rarely complete it.
How to create a learner profile that attracts the right tutors
Fill these fields first: target language, current level (beginner/intermediate/advanced), primary goal, weekly availability, and your time zone. Tutors scan these before they read anything else.

A short profile template you can paste directly:
Checklist to finish before you search:
- Email address verified
- Time zone set correctly in account settings
- Availability calendar filled in
- Goal and level fields completed
- At least one sentence in the "about me" section
Profiles with polished intro videos receive materially more trial bookings on the tutor side, and the same principle applies to learners: a complete, specific profile gets faster, more relevant responses.
Pro Tip: Mention one concrete thing you struggled with recently ("I freeze when I have to speak on the phone in French"). Tutors find specific problems far more useful than general level descriptions.
How do you search, filter and shortlist the right tutors?
Use filters in this order: language, then your level, then lesson type (conversation, exam prep, business), then availability, then price range. Do not start with price. Starting with price narrows your pool before you know who is actually a good fit.
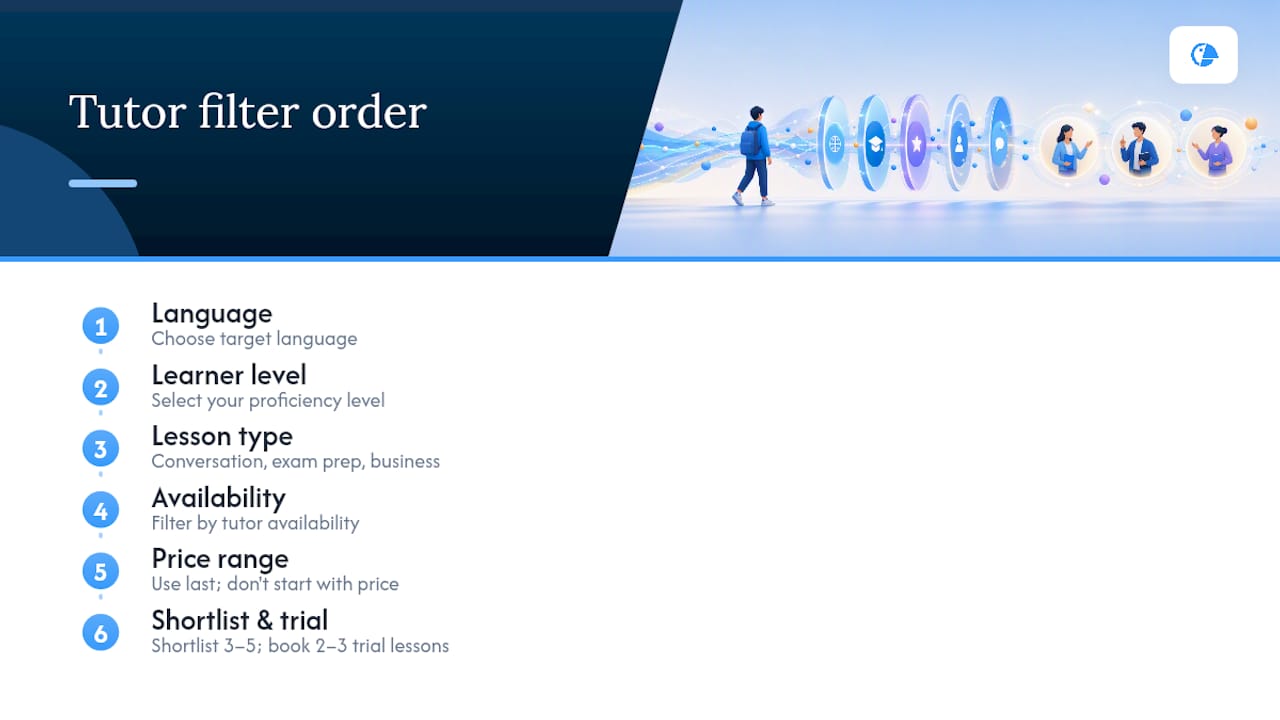
Positive signals in a bio: specific teaching methods named, mention of progress tracking or homework, an intro video that feels natural rather than scripted, and reviews that describe concrete outcomes ("my IELTS score went from 6.0 to 7.5").
Red flags: bios with no teaching method mentioned, reviews that only say "very nice," and no intro video at all.
Aim to shortlist three to five tutors. Booking two to three trial lessons before committing to a package is the most cost-effective way to test fit. Rank your shortlist by who best understood your stated goal, not by who had the most reviews.
Pro Tip: Read the evaluation criteria for tutor bios before you shortlist. Knowing what to look for saves you from booking a trial with someone who teaches a style that does not suit you.
What should you say when you message a tutor and book a trial?
Keep your first message to three or four lines. State your goal, your level, your availability, and one specific question. That is enough to test whether the tutor reads carefully and responds helpfully.
Sample opening message:
Questions to ask before you confirm a booking:
- What method or materials do you use for my level and goal?
- How do you structure a typical lesson?
- Do you assign homework, and how do you check it?
- How do you measure progress over time?
When the tutor replies, run through this confirmation checklist before you book: lesson date and time confirmed in your local time zone, lesson length agreed, trial price clear, and cancellation policy understood.
Pro Tip: A tutor who answers your specific question (not a generic reply) is already demonstrating the attentiveness that makes lessons productive.
Payment, fees, confirmations and scheduling best practices
Before you click "confirm," check the booking screen carefully. Some platforms add a service fee on top of the tutor's listed rate. For example, an 8% service fee can raise a listed $25 lesson to $27 at checkout. Always read the final price, not the headline rate.
What to verify on the confirmation screen:
- Date and time shown in your local time zone (not the tutor's)
- Tutor name matches who you messaged
- Lesson length is what you agreed
- Final price including any platform fee
- Cancellation window and policy
Most platforms send an immediate booking confirmation plus automated reminders 24 hours and 15–30 minutes before the lesson. Screenshot the confirmation anyway. If a tech issue occurs on lesson day, that screenshot is your fastest path to support.
Add the lesson to your calendar with the video link in the event notes. Set a second reminder for 30 minutes before the lesson so you have time for a tech check.
Pre-lesson checklist: what to do 30–60 minutes before your lesson
60 minutes before:
- Open the lesson link and confirm it loads correctly in your browser
- Test your camera and microphone in your video app settings
- Run a quick internet speed check (Speedtest.net is free and takes 30 seconds)
- Write down three things you want to cover or questions you want to ask
30 minutes before:
- Close unnecessary browser tabs and apps to free up bandwidth
- Have your notebook, pen and any homework open on your desk
- Log in to the platform and confirm the lesson is showing as confirmed
- Put your phone on silent
Bringing attempted homework, written drafts or audio recordings to lessons saves time by revealing your thinking errors faster. A 15-minute tech check before the first paid lesson prevents most missed-lesson tech failures.
Pro Tip: Write your three target items on a sticky note and put it next to your screen. When the lesson gets energetic and time moves fast, that note keeps you on track.
What happens in the first lesson, and how should you use the needs analysis?
The first lesson is usually a needs analysis: the tutor gathers information about your goals, your weakest skills, your schedule, your preferred learning style, and any affective factors such as speaking anxiety. This is not a test. It is a conversation that shapes every lesson after it.
Completing pre-lesson intake thoughtfully rather than at the last minute lets tutors prepare targeted materials before you even meet. Fill in any pre-lesson form at least 24 hours ahead.
Three things to say in the first session:
- "My biggest weakness right now is [specific skill]."
- "I learn best when [method: visual, audio, conversation-based, grammar-focused]."
- "I want to be able to [concrete outcome] by [date]."
A short needs-analysis template you can complete and share with your tutor:
Pro Tip: Bring one piece of your own work to the first lesson: a written paragraph, a voice memo of you speaking, or a screenshot of a conversation you had in the target language. Tutors can diagnose your real patterns from actual examples far more accurately than from a self-assessment.
After the lesson: how to follow up and keep momentum going
Send a one-to-two sentence recap to your tutor within 24 hours. Something as simple as "Thanks for today's lesson. I'll practise the subjunctive exercises and have them ready for next time" signals that you are engaged and helps the tutor plan ahead.
Organise your lesson notes the same day while they are fresh. Group new vocabulary, grammar points and corrections into three columns: "understood," "needs practice," and "ask again next lesson." Build your week's micro-practice plan from the tutor's feedback, not from a generic textbook.
Schedule your next lesson before you close the platform. Learners who leave without booking a next slot are far less likely to rebook. After lesson four, check in with your tutor: are the lessons matching your goal? Is the pace right? This is also the natural moment to ask for a review if you are happy, or to discuss switching to a lesson package for better value.
Common onboarding mistakes and how to fix them quickly
- Vague goals in the profile: Fix by writing one specific outcome with a date attached.
- Skipping the tech check: Fix by running a 15-minute check the day before your first lesson, not five minutes before it starts.
- Rushing pre-lesson forms: Fix by completing any intake form at least 24 hours early so your tutor can prepare.
- Bringing nothing to the lesson: Fix by preparing three questions or a piece of your own work before every session.
- Booking only one trial: Fix by trialling two to three tutors before committing to a package.
If a tutor's style genuinely does not suit you after a trial, switch without guilt. A polite message ("I think I need a different teaching approach for my goals") is all that is needed. The right fit makes every subsequent lesson more productive.
Pro Tip: If you feel the lesson went off-track, note what you wished had happened differently and bring it up at the start of the next session. Tutors appreciate specific feedback far more than silence.
Your copyable onboarding checklist
Before you search:
- Goal written with a specific outcome and date
- Current level honestly assessed
- Availability and time zone confirmed
Account and profile:
- Email verified, time zone set, availability filled in
- Profile bio written using the template above
- Goal and level fields completed
Finding and booking a tutor:
- Three to five tutors shortlisted using filters
- Initial message sent with goal, level and one specific question
- Trial lesson booked with confirmation screenshot saved
- Final price (including any platform fee) verified
- Lesson added to calendar with video link
Before lesson 1:
- Pre-lesson form completed at least 24 hours early
- Tech check run (camera, mic, internet, browser)
- Three questions or a piece of your own work prepared
After lesson 1:
- Recap message sent to tutor within 24 hours
- Notes organised into "understood / needs practice / ask again"
- Next lesson booked
Lesson 4 check-in:
- Review progress against your original goal
- Ask tutor for feedback on your development
- Decide on package or continue with individual bookings
Why preparation, not luck, is the hidden lesson
The learners who get the most from private tutoring are rarely the most naturally gifted. They are the most prepared. They arrive with a written goal, a piece of their own work, and three questions. They complete intake forms early. They send a recap within 24 hours. None of these habits are difficult; they are simply consistent.
At Tutoroo, we see this pattern clearly across a community of over 386,000 language teachers and the learners they work with. The students who progress fastest are not the ones who found the "perfect" tutor on the first try. They are the ones who treated the onboarding process as part of the learning itself. Use the checklist above, book your trial lesson with a prepared agenda, and let the preparation do the work.
Tutoroo makes every onboarding step easier
Finding a private language tutor who fits your goals, schedule and budget used to mean weeks of searching. With Tutoroo, the entire student onboarding process sits in one place: profile prompts guide you through goal-setting, smart filters narrow your tutor search by language, level and availability, and the built-in messaging system lets you ask the right questions before you commit to a booking.
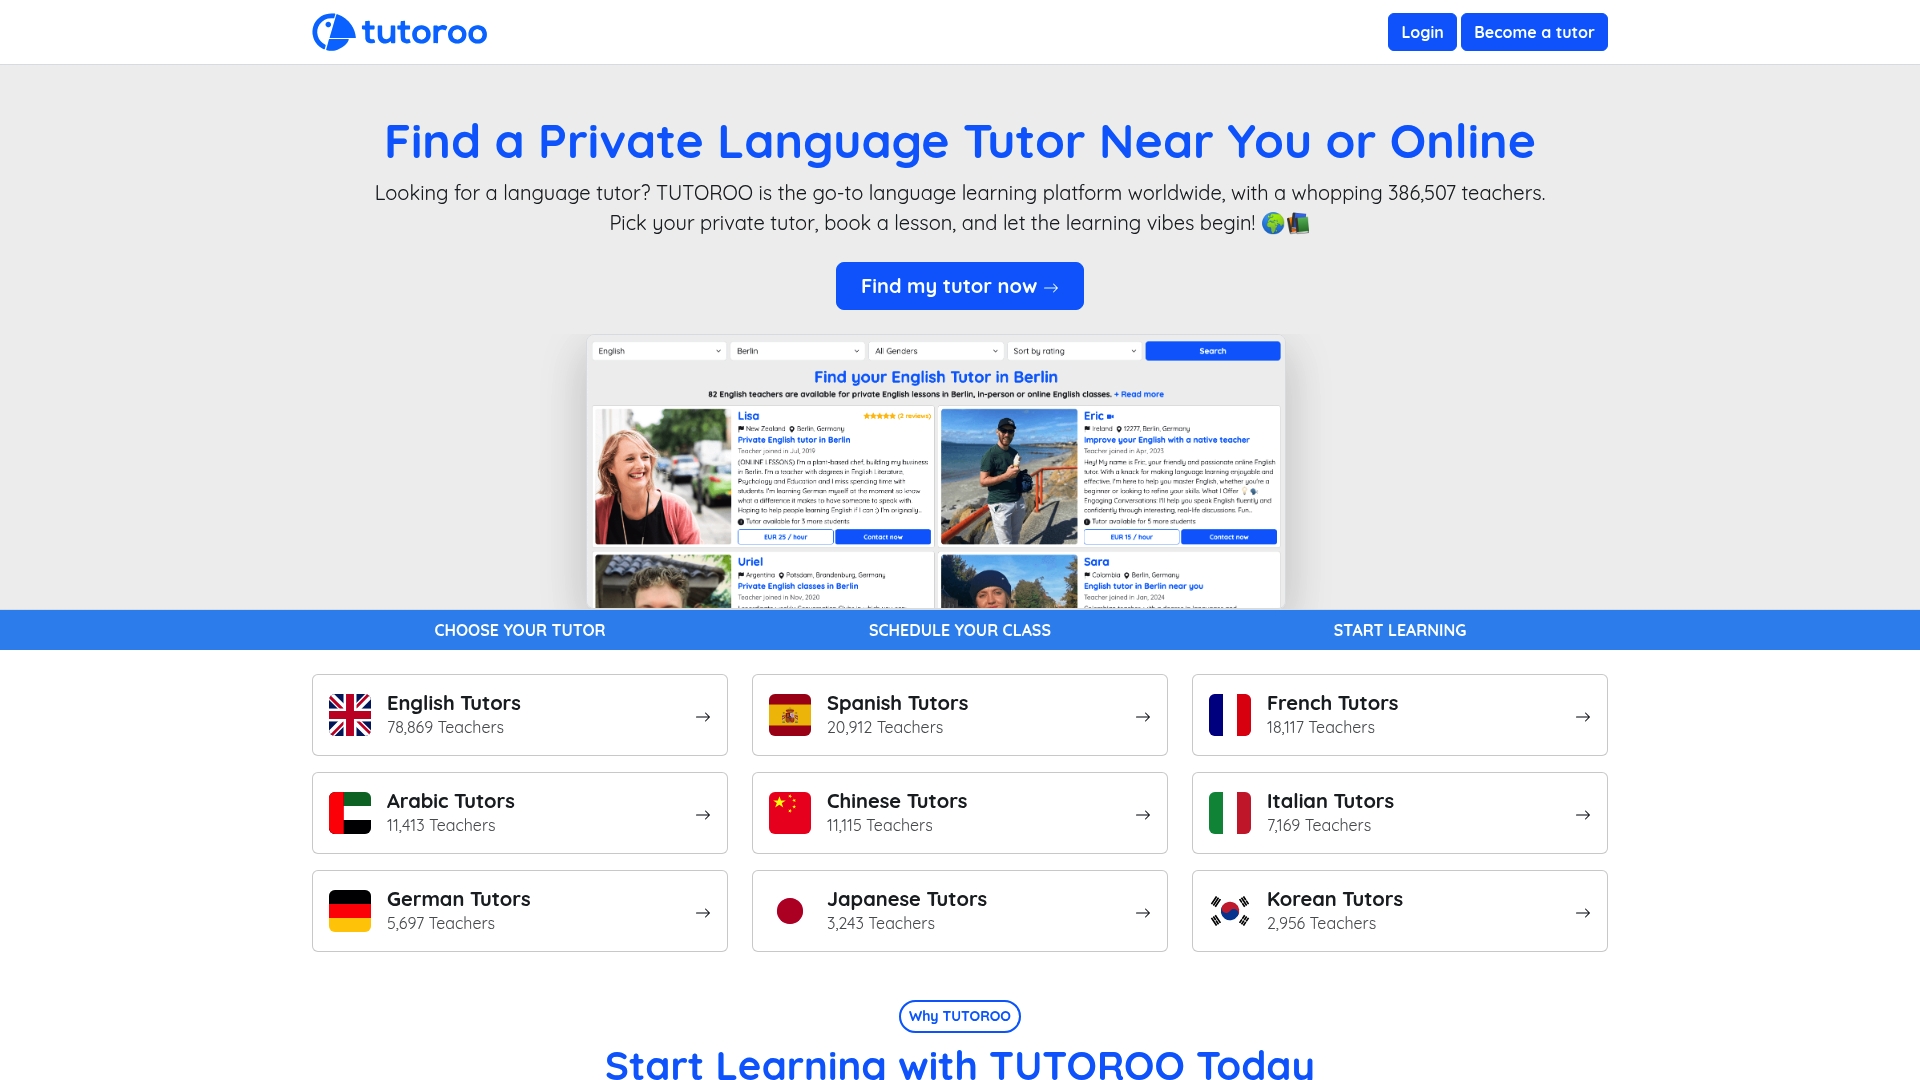
Over 386,000 tutors across dozens of languages are ready to match with learners at every level, from absolute beginners to near-fluent speakers preparing for professional certification. Whether you are looking for a Malay tutor or a teacher for Spanish, French, Arabic or Mandarin, the trial lesson flow is the same: clear, confirmed and supported by automated reminders so nothing falls through the cracks. Find your tutor on Tutoroo and book your first trial lesson today.
Sources
Getting the most from your first lessons means having the right resources close at hand. The links below cover the practical steps this guide describes.
Platform guides and booking how-tos:
- How do I onboard a new online tutoring student? (A practical first-week workflow for the days between "yes, we'll book" and lesson 4) | Koala Go
- Formative assessment of language: an essential feature of curriculum design
Free tech check tools:
Organising your study materials: